Okay, friends, let’s talk bread. But not just any bread. We’re diving headfirst into a loaf that’s as intriguing as it is delicious: Seeded Miso Sweet Potato Bread Recipe. I know what you might be thinking – miso in bread? Sweet potato? Are we crazy? Maybe a little, but in the best way possible! This isn’t your average supermarket loaf; it’s an experience, a flavor journey, a hug in a slice. Forget everything you think you know about quick breads because this recipe is about to blow your mind.
Table of contents
- Why You Need This Seeded Miso Sweet Potato Bread Recipe in Your Life
- Crafting the Perfect Seeded Miso Sweet Potato Bread Recipe: A Step-by-Step Guide
- Common Problems: Troubleshooting Your Seeded Miso Sweet Potato Bread Recipe
- Variations and Creative Twists: Level Up Your Loaf
- Serving Suggestions and Storage Tips
- The Final Word: Your Journey to Miso Bread Bliss
- Frequently Asked Questions (FAQs) About Seeded Miso Sweet Potato Bread Recipe
Why You Need This Seeded Miso Sweet Potato Bread Recipe in Your Life
So, why should you even bother with this slightly unusual bread recipe? Well, let me break it down for you. It’s not just about having something to slather butter on (though, let’s be honest, that’s a major perk). It’s about the magic that happens when you combine unexpected flavors.
The Magic of Miso: More Than Just Soup!
First up, we have the mysterious, umami-rich miso. If you’ve only ever encountered miso in soup, you’re in for a treat. Miso, a fermented soybean paste, adds this incredible savory depth that cuts through the sweetness of the potato, creating a balanced flavor profile that’s simply addictive. It’s not overpowering; it’s more like a subtle undercurrent that keeps you coming back for more. Think of it as the secret ingredient that takes your bread from “good” to “wow, what is that?!” Miso brings this unique dimension, a kind of “fifth taste” that plays so well with other ingredients.
Sweet Potato Superstar: Health and Flavor Combined
Next, let’s talk sweet potatoes. These vibrant orange gems aren’t just pretty; they’re packed with vitamins, fiber, and antioxidants. But beyond the health benefits, sweet potatoes bring a moistness and a natural sweetness to the bread that’s just divine. They keep the loaf incredibly tender and give it that beautiful golden color we all love. They create this wonderful, almost creamy texture inside. Imagine the gentle sweetness of a freshly baked sweet potato pie meeting the satisfying chew of a rustic loaf. Yes, it’s that good. And they make for a perfect combination with the miso.
Seed Power: Adding Texture and Nutrition
Now for the final touch, the seeds! We’re not talking just any old sprinkling of seeds. We’re talking a hearty mix that adds a wonderful crunch and nutty flavor that makes every bite an adventure. Think of it like the satisfying crackle of a perfect crust, adding both texture and nutrition. Seeds aren’t just pretty; they’re little powerhouses of nutrients, adding healthy fats and fiber. They’re like tiny jewels, scattered throughout the bread, making each slice a delightful surprise. Plus, they make this loaf beautiful! It’s as pleasing to the eye as it is to the tastebuds.
So, there you have it. Miso for depth, sweet potato for sweetness and moisture, and seeds for texture and nutrition. This isn’t just bread; it’s a flavor symphony, a texture party, and a nutritional powerhouse, all rolled into one scrumptious loaf. Ready to bake? Let’s go!
Crafting the Perfect Seeded Miso Sweet Potato Bread Recipe: A Step-by-Step Guide
Alright, now that I’ve hopefully convinced you that this bread is the best thing since, well, sliced bread, let’s get to the good stuff: actually making it! Don’t worry, even if you’re not a baking pro, this recipe is pretty straightforward. It’s all about taking your time, enjoying the process, and letting those flavors work their magic.
Gathering Your Ingredients: Seeded Miso Sweet Potato Bread Recipe
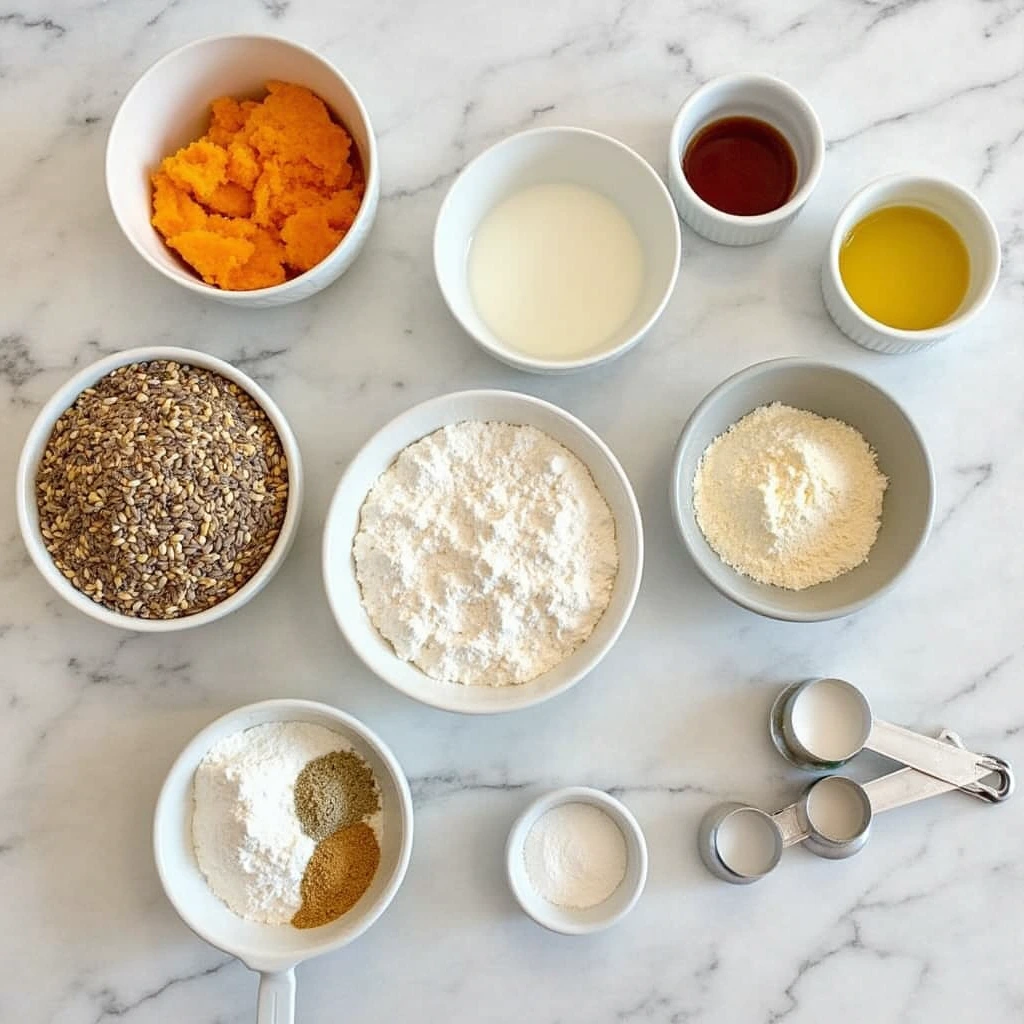
Before we dive into the baking process, let’s make sure you have everything you need. This is key to a smooth and stress-free baking experience. Think of it as assembling your team before the big game – everyone needs to be present and ready to go!
The Wet Ingredients
- 1 cup (240ml) mashed cooked sweet potato (make sure it’s cooled!)
- ½ cup (120ml) milk (any kind will work; almond, soy, or dairy)
- ¼ cup (60ml) vegetable oil (or melted coconut oil)
- 2 large eggs
- 2 tablespoons miso paste (white or red, your choice!)
- 1 teaspoon vanilla extract
The Dry Ingredients
- 2 cups (250g) all-purpose flour (or a 1:1 gluten-free blend)
- ½ cup (100g) packed light brown sugar
- 2 teaspoons baking powder
- 1 teaspoon baking soda
- 1 teaspoon ground cinnamon
- ½ teaspoon ground ginger
- ½ teaspoon salt
The Seed Mix
- ¼ cup (30g) pumpkin seeds (pepitas)
- ¼ cup (30g) sunflower seeds
- 2 tablespoons sesame seeds
- 1 tablespoon chia seeds
Make sure you’ve got all of these lined up. I like to measure everything out before I even start mixing. It’s like having your mise en place in a restaurant kitchen – you’re prepared for success!
Step-by-Step Baking Instructions: Seeded Miso Sweet Potato Bread Recipe
Okay, let’s get baking! I promise it’s easier than it looks. We’re going to break it down into smaller steps to make the process even smoother.
Preheat and Prep: The Foundation
First things first, let’s get your oven ready. Preheat it to 350°F (175°C). While that’s warming up, grab your 9×5 inch loaf pan. Now, this is important: grease it and flour it well, or, if you prefer, line it with parchment paper. This step is crucial, my friend! No one wants a beautiful loaf of bread stuck to the pan. It’s the foundation of a great baking experience.
Whisk the Wet: The Flavor Paint
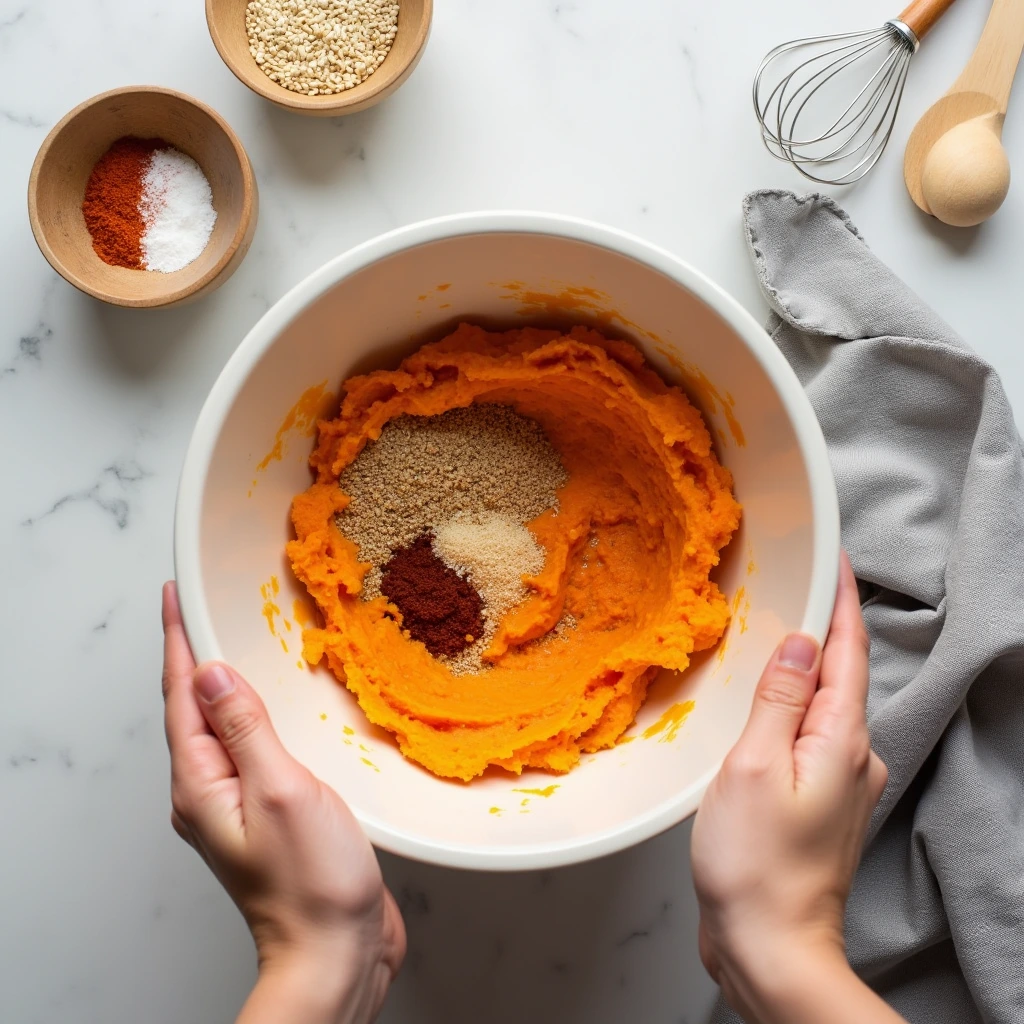
Next, we dive into the wet ingredients. In a large bowl, it’s time to whisk together the mashed sweet potato (make sure it’s cooled down!), milk, oil, eggs, miso paste, and vanilla extract. Whisk until everything is nice and smooth. I like to imagine I’m painting with flavors – every ingredient needs to blend harmoniously to create a beautiful masterpiece. Get in there with the whisk and make sure it all becomes one glorious mixture!
Combine the Dry: The Texture Base
Now, for the dry ingredients! Grab a separate bowl, and whisk together the flour, brown sugar, baking powder, baking soda, cinnamon, ginger, and salt. This step ensures that all the leavening and spices are evenly distributed throughout the batter. It’s the base that will give our bread its perfect texture, and it’s important to get it right.
The Big Mix: The Gentle Fold
It’s time for the big mix, but gently! Gradually add the dry ingredients to the wet ingredients. Mix until just combined. I cannot stress this enough – don’t overmix! Overmixing develops the gluten in the flour and leads to tough bread, and we definitely don’t want a brick. We want tenderness and love. A few lumps are totally okay, so don’t stress if your batter isn’t completely smooth at this stage.
Fold in the Seeds: The Jewels of the Loaf
Time for the jewels of our loaf! Gently fold in your seed mix. Make sure they’re evenly distributed throughout the batter. Think of those seeds as little nutritional flavor bombs and textural delights; don’t leave them out! We want each bite to be a party in your mouth.
Into the Pan: Ready for the Oven
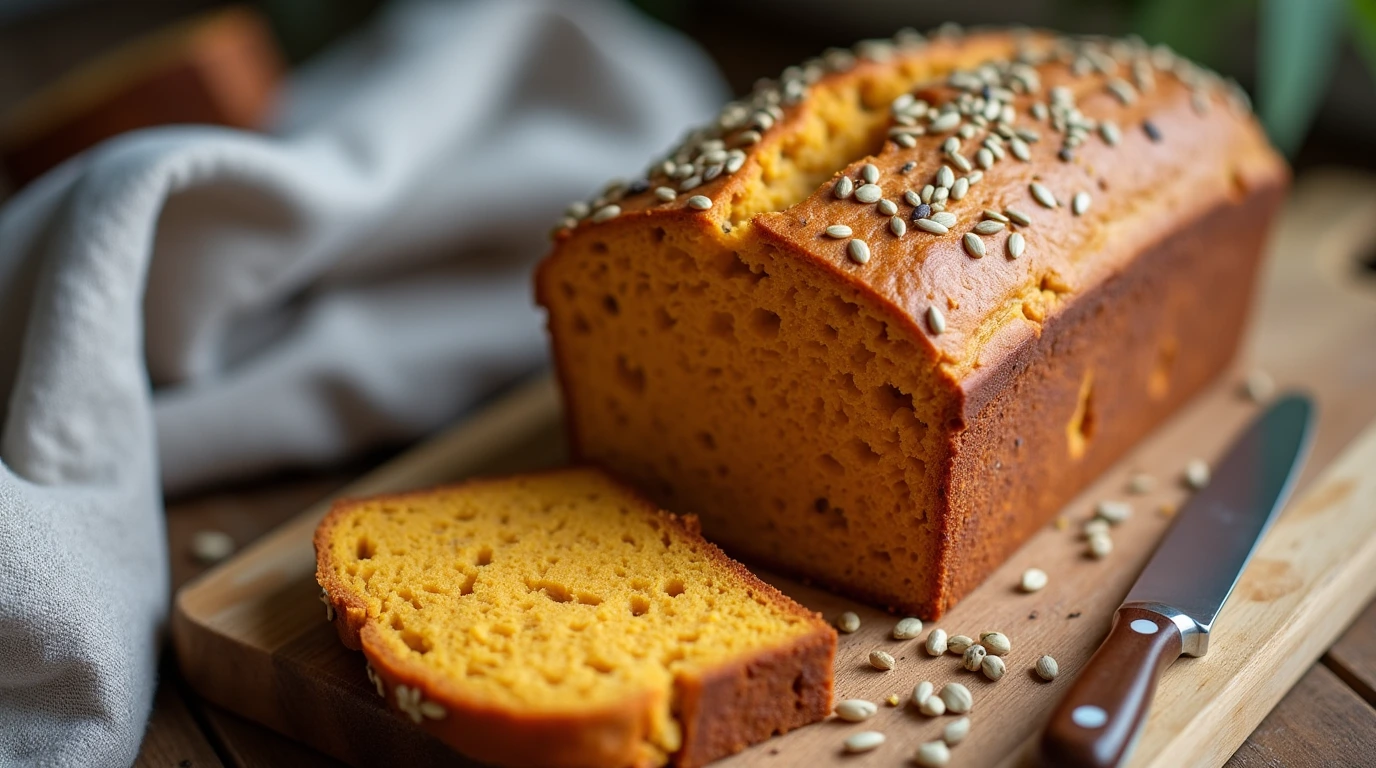
Pour the batter into your prepared loaf pan, and spread it out evenly. If you’re feeling extra fancy, sprinkle a few extra seeds on top for visual appeal – make it pretty! This is your time to get creative and show off your flair, not only to your oven but also to yourself!
Bake Away!: The Transformation
Place the loaf pan in the preheated oven, and bake for 50-60 minutes, or until a toothpick inserted into the center comes out clean, or with just a few moist crumbs clinging to it. Start checking around 50 minutes; every oven is different, so you’ll need to keep an eye on your bread. As they say, “The smell of baking bread is one of the most comforting things in the world.” – Unknown
Cool Down: The Final Touch
Once the baking is done, let the bread cool in the pan for 10 minutes before transferring it to a wire rack to cool completely. I know it smells amazing, but try to resist the urge to slice it right away! This step allows the crumb to set properly. If you slice it while it is still warm, it may get a bit gummy!
And that’s it! You’ve just baked a Seeded Miso Sweet Potato Bread masterpiece. Wasn’t that satisfying? Now, the only thing left to do is enjoy your wonderful creation! I promise, the combination of sweet, savory, and nutty will keep you coming back for more! Next, we’ll look at how to troubleshoot some common baking problems, plus a couple of variations if you are feeling extra adventurous.


Common Problems: Troubleshooting Your Seeded Miso Sweet Potato Bread Recipe
Even with the best intentions and the most carefully followed recipe, sometimes things can go a little sideways in the kitchen. Don’t worry, baking mishaps are a totally normal part of the process! The good news is, most common bread problems have pretty simple solutions. Let’s tackle the most common issues you might encounter with your Seeded Miso Sweet Potato Bread and how to fix them.
The Bread is Too Dense
If your bread turns out more like a brick than a fluffy cloud, here’s what might have gone wrong:
- Overmixing: This is the biggest culprit! Overmixing develops the gluten in the flour, leading to a dense, tough texture. Solution: Mix until the ingredients are just combined. Don’t be afraid of a few lumps! It’s better to undermix than overmix.
- Expired Leavening Agents: Baking powder and baking soda lose their potency over time. If they’re past their prime, your bread won’t rise properly. Solution: Check the expiration dates on your leavening agents. Replace them if they’re old. You can test baking soda by putting a little in a glass with some vinegar, if it fizzes, it’s good!
- Too Much Sweet Potato: Too much mashed sweet potato can weigh down the batter. Solution: Make sure you measure your mashed sweet potato accurately.
The Bread is Too Dry
A dry loaf is a sad loaf. Here’s how to avoid it:
- Overbaking: Baking for too long can dry out the bread. Solution: Start checking the bread for doneness around 50 minutes of baking. A toothpick inserted into the center should come out with just a few moist crumbs attached, not wet batter.
- Inaccurate Measurements: Too much dry and not enough wet ingredients can lead to a dry loaf. Solution: Double-check your measurements.
- Low Moisture Ingredients: If you are using a very thick sweet potato puree, or a very dry flour, this can contribute to a dryer bread. Solution: Ensure you are using a good quality flour, and that your sweet potato isn’t too dry. You can also add an extra tablespoon of milk or oil.
The Miso Flavor is Too Strong
While I love the savory kick of miso, sometimes it can be a bit overwhelming.
- Using a Strong Miso: Red miso has a much bolder flavor than white miso. Solution: If you’re sensitive to strong flavors, opt for a white or a light-yellow miso for a more subtle flavor.
- Too Much Miso: Adding too much miso can overpower the other flavors. Solution: Start with 2 tablespoons of miso. You can always add more next time if you like a stronger flavor, but you can’t take it out!
Variations and Creative Twists: Level Up Your Loaf
Now that we’ve covered the basics and some common pitfalls, let’s get to the fun part: playing with flavors! This recipe is a great starting point, but feel free to make it your own.
Adding Nuts and Dried Fruit
Want to add some extra texture and sweetness? Try adding ½ cup of chopped nuts (like walnuts, pecans, or almonds) and ½ cup of dried fruit (like raisins, cranberries, or chopped dates) to the batter. I like to toast my nuts a little bit before adding them to the bread, it really brings out their flavor.
Savory Herbs and Cheesy Goodness: A Hearty Option
For a more savory version, add 2 tablespoons of chopped fresh herbs (like rosemary, thyme, or chives) and ¼ cup of grated cheese (like cheddar or Parmesan) to the batter. It’s like a whole different loaf! This is wonderful with a hearty soup. 🌿🧀
Serving Suggestions and Storage Tips
Alright, your bread is baked, cooled, and looking absolutely amazing. Now what? Here are some tips on how to best enjoy your seeded miso sweet potato bread and how to keep it fresh.
How to Best Enjoy Your Seeded Miso Sweet Potato Bread Recipe
This bread is incredibly versatile, and just like a great Texas BBQ spread, it can be enjoyed in so many ways. Here are a few ideas to get you started:
- Classic: A simple slice with a pat of butter or a drizzle of olive oil is perfect for breakfast or a snack. It’s the basic, comforting experience, just like a good Texas BBQ Potato Salad.
- Elevated: Toast a slice and top it with avocado, a fried egg, or some cream cheese for a more substantial meal. Think of it like upgrading a simple sandwich to a gourmet experience, much like the difference between a basic burger and a Chopped Beef Sandwich.
- Sweet and Savory: Spread some jam or honey on a slice for a delightful sweet and savory combination. This is where the sweet of the sweet potato really shines, blending well with both flavors, similar to how sweet and spicy work so well in Smoked Chorizo Queso.
- With Soup or Salad: This bread is a fantastic accompaniment to soups or salads, especially on a cozy night. It’s the perfect complement to a lighter meal, much like how a great side can elevate Texas Hot Links.
- Grilled Cheese Twist: Slice it thick, add your favorite cheese, and grill it up for a comforting grilled cheese with a twist. It’s a familiar comfort with a fun twist – just like how we make a classic bread recipe but we include our own twist that is a little bit of savory and a little bit sweet just like our Butter-Free Banana Bread
Storing Your Loaf to Maintain Freshness
- Countertop: For short-term storage (1-2 days), wrap the bread tightly in plastic wrap or place it in an airtight container at room temperature. I like to wrap it in parchment paper first, then plastic wrap – think of it as a double layer of protection to keep it fresh.
- Refrigerator: For longer storage (up to a week), store the bread wrapped in plastic wrap or in an airtight container in the refrigerator. This helps it retain moisture, keeping it as delicious as the day it was baked.
- Freezer: For long-term storage (up to 3 months), slice the bread, wrap each slice individually in plastic wrap, and then place them in a freezer bag. This makes it easy to grab a slice whenever you like. Thaw at room temperature or in the toaster – it’s perfect for when you want just a quick bite!
“Baking is therapy. It makes me feel good, and sharing it with others is even better.” – Unknown
The Final Word: Your Journey to Miso Bread Bliss
Congratulations, you’ve made it to the end of this epic miso bread adventure! You now have a delicious, unique, and incredibly satisfying recipe to add to your baking repertoire. Don’t be afraid to experiment and make it your own. Baking is all about having fun, learning, and enjoying the delicious results. I hope this recipe brings you as much joy as it has brought me!
Frequently Asked Questions (FAQs) About Seeded Miso Sweet Potato Bread Recipe
Let’s tackle some of the most common questions you might have about this recipe.
Can I Use a Different Type of Miso?
Absolutely! While I recommend white or yellow miso for a milder flavor, you can certainly use red miso if you enjoy a stronger, more intense taste. Just remember that it might be more prominent in the final product. Play around and see what you prefer!
Can I Substitute the Seeds?
Yes, you can substitute the seeds based on your preferences or what you have available. Flax seeds, hemp seeds, or even poppy seeds would work well. Feel free to experiment and create your own perfect seed mix.
Can I make this recipe gluten-free?
Yes, you can! Simply substitute the all-purpose flour with a 1:1 gluten-free flour blend. Make sure it’s one that’s designed to work in baking. The other ingredients should be naturally gluten-free, but double-check if you have serious concerns.
And that concludes our journey into the wonderful world of Seeded Miso Sweet Potato Bread! I hope you enjoy baking this delicious recipe and sharing it with your loved ones. Happy baking! 🥳

